


Rabbit Ears (F3)

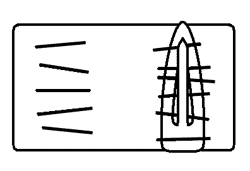
Bunny ears are tall and thin so making them stand upright without a support structure is tricky. These ears are knitted in one, with a lengthwise fold and a solid base worked in. If the fabric of the knitting is firm enough, that allows them to stand on their own.
A printable version of this pattern is available.
You will need:
- pink and white double knit yarn
- 2 x hair grips (or an Alice band)
- 3.25mm knitting needles
- tapestry needle
- scissors
Pattern:
Cast on 100 stitches in white, marking the centre point.
(A list of abbreviations is available.)
- Row 1: k –
- Row 2: p –
- Row 3: k –
The following is a set of short rows. For ease of counting the stitches before and after the centre point are given individually. There should always be 100 stitches total on the needles.
- Row 4:
p50, p18, w&t/
k18, k18, w&t/
p18, p28, w&t/
k28, k28, w&t/
p28, p36, w&t/
k36, k36, w&t/
p36, p42, w&t/
k42, k42, w&t/
p42, p46, w&t/
k46, k46, w&t/
p26, p50.
Stocking stitch five rows straight, beginning and ending with a knit row.
The next row begins at the centre point of the previous row. Slip the first 50 stitches from the left needle to the right, reaching the marker in the middle. Hold the knitting so that the purl sides of the white stitches are facing you, then work as follows in pink (there is no need to cut the white yarn).
- Row 10:
k48, turn/
p48, p48, turn/
k48, k47, w&t/
p47, p47, w&t/
k47, k46, w&t/
p46, p46, w&t/
k46, k44, w&t/
p44, p44, w&t/
k44, k42, w&t/
p42, p42, w&t/
k42, k39, w&t/
p39, p39, w&t/
k39, k36, w&t/
p36, p36, w&t/
k36, k32, w&t/
p32, p32, w&t/
k32, k28, w&t/
p28, p28, w&t/
k28, k23, w&t/
p23, p23, w&t/
k23, k18, w&t/
p18, p18, w&t/
k18.
Return 50 stitches from the right needle to the left so that the uncut white yarn is at the start of the row.
Work as follows in white:
- Row 11: p2, k2, k24, p2
Stocking stitch five rows straight, beginning and ending with a knit row.
- Row 12:
p50, p46, w&t/
k46, k46, w&t/
p46, p42, w&t/
k42, k42, w&t/
p42, p36, w&t/
k36, k36, w&t/
p36, p28, w&t/
k28, k28, w&t/
p28, p18, w&t/
k18, k18, w&t/
p18, p50.
Thread yarn through remaining stitches and pull tight.
Making Up:
Make sure the ends of pink yarn are fixed securely before they are hidden on the inside of the ears. Neatly sew the cast-on and cast-off edges together in one long seam, pulling the ear tip stitches into points as you go.

Lay the knitting flat with the pink area on top. Fold in half along the length and fix into position with a line of stitches across the middle. Fold in half along the width-wise stitches then tack the ears together with a couple of stitches about half way up the inside edge. Open out the ears so that the pink insides show, and flatten the central folded fabric to make a firm base.
The flat, folded area at the base of the ears is used to secure them into position. Work five or six big stitches on either side of the base, insert hair clips through each set of stitches and attach directly to your hair. Use more grips for a firmer hold.

Long hair can be used to hide the the base by pulling a section from the front of the head over the knitting, between the ears. Pull the hair into a tight enough pony tail and it's possible to secure the ears without using grips at all.

Alternatively the ears can be secured to an Alice band and worn that way.
Notes:
Needle/Yarn Size
As with most ODDknit patterns the yarn and needle sizes in the "you will need" section are just a guide. Feel free to improvise with whatever needles and yarn you have lying around - that's half the fun!
<<< See more Costume Knits
© 2016 All desgins and images are copyright of ODDknit. If you enjoy the content of this website, please consider buying me a coffee at the link below.