
June 2013
ODDknit.com was launched in June 2010 which means this month is our third birthday!
30/06/2013
Grids
In my knitting irregular shapes section I talked about how to set up a grid and use it to plan knitted shapes. I'm going to take a similar approach to design my leaves.
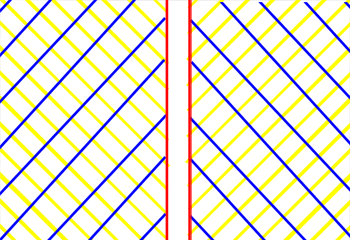
The three different fabrics I set up last time all have rows that lay at an angle to the centre. When I set up a grid it will have to reflect that.
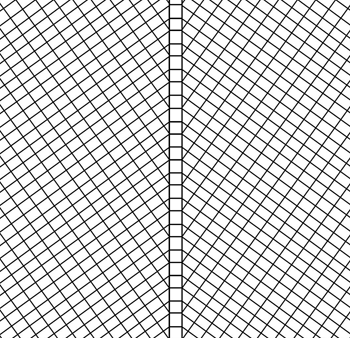
I should really take measurements from my samples and use them to work out angles and row heights because that's sort of my thing. In fact I did exactly that for the oak leaf fabric. Here's the grid.
I'm not in the mood to do this for the others so I'm going to cheat.
For my cheating process I need photo-editing software that allows me to use layers (I've got Photoshop Elements). I could do basically the same thing with a hard-copy photo and tracing paper if I wanted, but its neater to do everything on the computer if possible.
To set up your grid:
- Take a photo of your sample fabric and upload it onto your computer.
- On a separate, transparent layer draw two straight lines along the edges of the adjacent rows and columns.
- Remove the photo layer so you are just let with the lines.
- Copy/Paste the lines until you have a complete grid.
So basically...
...step 2
...step 4
...which in monochrome becomes...
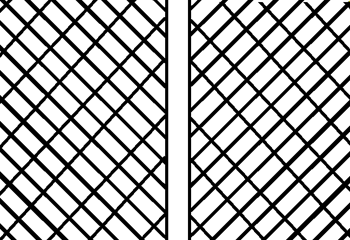
It's not as neat as the grid I worked out properly, but it's good enough to get the job done.
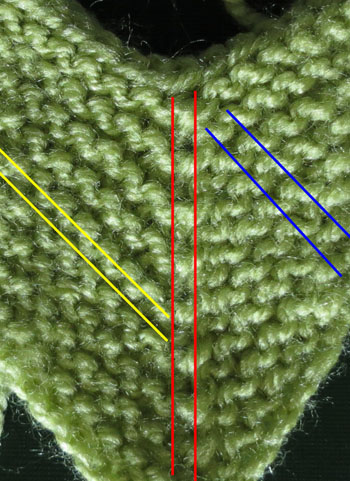
Notice how the little rectangles that represent a single stitch are angled up in this grid, but angled down in the oak leaf grid nearer the top of the page. It's because in the oak leaf the veins are represented by a column of stitches. To make them spread outwards we increased at the centre of the fabric. For the horsechestnut fabric we decreased at the centre of the fabric and the veins are represented by a row of stitches. Similar results, different methods.
22/06/2013
Project Time
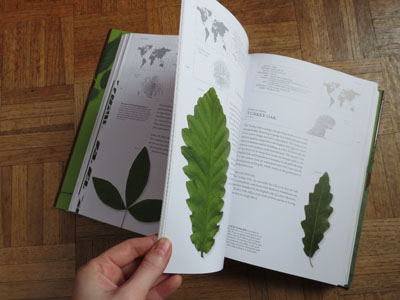
Dad has a new book.
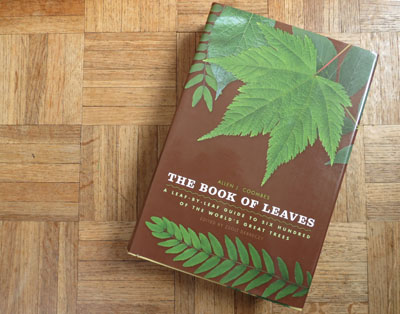
Inside there are actual size pictures of leaves from hundreds of trees.
Guys, I wanna knit a forest.
I'm trying to go about it in a semi-organised manner. The first step I'm taking today is to look at the fabric of the leaves, rather than the shape.
Each leaf should have a central stem with thinner veins coming away from it at an angle. In the past I've knitted three types of leaves; a horse chestnut leaf, an oak leaf and a rose leaf (the rose leaf isn't on the website yet). The fabric of each leaf was made differently.
Below I've done samples of each of the fabrics.
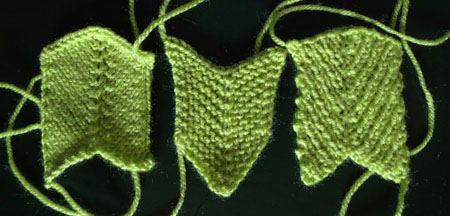
First is stocking stitch fabric (used in the oak leaf). It was made by casting on 17 and knitting
- Row 1: p –
- Row 2: k1, k2tog, k4, kfb, kfb, k6, k2tog
Second is a garter stitch fabric (used in the horse chestnut leaf). It was made by casting on 17 and knitting
- Row 1: k8, p1, k8
- Row 2: kfb, k6, sl1, k2tog, psso, k5, kfb, k1
Third is a ribbed fabric (used in the rose leaf). It was made by casting on 19 and knitting
- Row 1: k2tog, [p1, k1] x 3, pfb, kfb, [p1, k1] x 3, p1, k2togtbl
- Row 2: [p1, k1] x 9
- Row 3: p2tog, [k1, p1] x 3, kfb, kfb, [k1, p1] x 3, k1, p2tog
- Row 4: [k1, p1] x 9, k1
I'm going to draw up grids for each type of fabric. Then when I want to design a leaf pattern I can choose a fabric based on how ridged the leaf is and use the grid to work out how to make the correct shape.
15/06/2013
Finally An Update
Hello! Sorry about lack of updates so far this month. I've either been at work or visiting my family at their Open Studios Event. I'm not taking part this year but I liked going to visit. They're all wonderful artists so if you're in Southern Kent, England (realise that may be a long shot) then you should really check out their exhibition!
Anyway I've been adding more shapes to last months flat shape library. I added a few pictures to the gallery too.
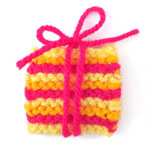
The whole point of the flat shapes was to make a “thank you for the free wool” card and that's now done and ready to be spent. I'm clinging to the idea that someone who gives away boxes of yarn is unlikely to be checking a knitting website regularly so hopefully this will still be a surprise.
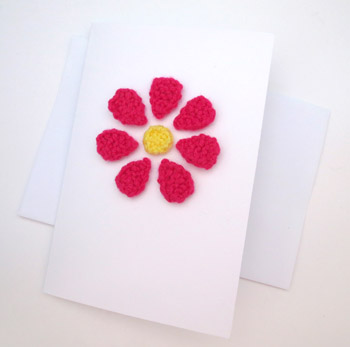
It's simple but I like it. I stuck each shape down with a small dab of superglue as I didn't want to use a glue that was too wet and would make the card runkle. If I had more reliable handwriting I would put "THANKS" on the outside. As it is I'm going to write it on the inside where it doesn't matter if I spell it wrong.
02/06/2013
Gallery!
In honour of our anniversary I've set up an on-site gallery. I know, I know, there are only three pictures in it now. I'm going to start adding new photos to it as they are taken.
© 2013 All desgins and images are copyright of ODDknit. If you enjoy the content of this website, please consider buying me a coffee at the link below.