
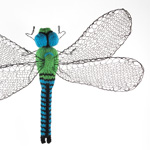
Butterfly (F3)

Made with thin wire these butterflies will tremble pleasingly when stood on a moving surface. The pattern is simple to knit (especially if made plain) but the colour work and sewing up get fiddly.
A printable version of this pattern is available.
You will need:
- scraps of coloured yarn (dk weight)
- black wire (0.6mm approx)
- knitting needles (3mm)
- tapestry needle
- scissors
The wing designs can either be knitted in plain colours or from one of the colour charts provided in "Variations" below. Because the cast on edge is shown as the bottom line of the chart pattern I have included it as Row 1 in each of the patterns to avoid confusion.
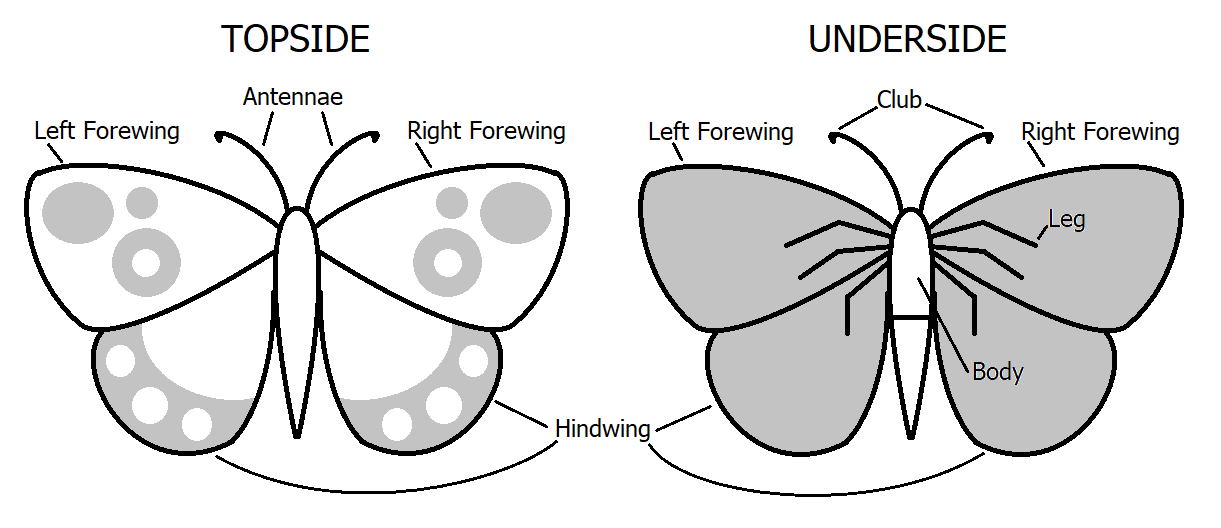
The left and right forewings are knitted to be mirror images of each other. Because they are different shapes you need to keep track of which is which. In this pattern a left forewing shape is sewn to a right forewing shape to make one whole forewing.
Pattern:
(A list of abbreviations is available.)
Body – Make 1
TOPSIDE
The body is knitted in two small pieces.
- Row 1: cast on 2
- Row 2: p –
- Row 3: kfb, k1 (3)
- Row 4: p –
- Row 5: p1, k1, p1
Repeat the last row seven more times.
- Row 13: k –
- Row 14: p –
Repeat these two rows four more times each.
- Row 19: sl1, k2tog, psso (1)
Thread yarn through remaining stitch and pull tight.
UNDERSIDE
Work as per TOPSIDE until row 5. Repeat final row nine more times, then cast off.
Left Forewings – Make 2
- Row 1: cast on 4 sts
- Row 2: p4, cast on 5 (9)
- Row 3: k8, inc, k1 (10)
- Row 4: p10, cast on 4 (14)
- Row 5: k –
- Row 6: p13, inc, p1 (15)
- Row 7: k –
- Row 8: p14, inc, p1 (16)
- Row 9: k14, k2tog (15)
- Row 10: p –
- Row 11: k –
- Row 12: p –
- Row 13: k13, k2tog (14)
- Rows 14 - 16: as rows 10 - 12
- Row 17: k12, k2tog (13)
- Row 18: p –
- Row 19: k11, k2tog (12)
- Row 20: p –
- Row 21: k10, k2tog (11)
- Row 22: p –
- Row 23: k9, k2tog (10)
- Row 24: p2tog, p8 (9)
- Row 25: k7, k2tog (8)
- Row 26: p2tog, p6 (7)
- Row 27: k5, k2tog (6)
- Row 28: p2tog, p4 (5)
- Row 29: k3, k2tog (4)
- Row 30: p2tog, p2 (3)
- Row 31: sl1, k2tog, psso
Thread yarn through remaining stitch and pull tight.
Right Forewings – Make 2
- Row 1: cast on 4
- Row 2: k4, cast on 5 (9)
- Row 3: p8, inc, p1 (10)
- Row 4: k10, cast on 4 (14)
- Row 5: p –
- Row 6: k13, inc, k1 (15)
- Row 7: p –
- Row 8: k14, inc, k1 (16)
- Row 9: p13, p2tog, p1 (15)
- Row 10: k –
- Row 11: p –
- Row 12: k –
- Row 13: p12, p2tog, p1 (14)
- Row 14 - 16: as rows 10 - 12
- Row 17: p11, p2tog, p1 (13)
- Row 18: k –
- Row 19: p10, p2tog, p1 (12)
- Row 20: k –
- Row 21: p9, p2tog, p1 (11)
- Row 22: k –
- Row 23: p8, p2tog, p1 (10)
- Row 24: k1, k2tog, k7 (9)
- Row 25: p6, p2tog, p1 (8)
- Row 26: k1, k2tog, k5 (7)
- Row 27: p4, p2tog, p1 (6)
- Row 28: k1, k2tog, k3 (5)
- Row 29: p2, p2tog, p1 (4)
- Row 30: k1, k2tog, k1 (3)
- Row 31: sl1, p2tog, psso
Thread yarn through remaining stitch and pull tight.
Hindwings – Make 4
- Row 1: cast on 7 sts
- Row 2: p –
- Row 3: k1, inc, k5, inc, k1 (9)
- Row 4: p1, inc, p7, inc, p1 (11)
- Row 5: k1, inc, k9, inc, k1 (13)
- Row 6: p1, inc, p11, inc, p1 (15)
- Row 7: k –
- Row 8: p1, inc, p13, inc, p1 (17)
- Row 9: k –
- Row 10: p –
- Row 15: k1, k2tog, k12, k2tog
- Row 16: p –
- Rows 17 & 18: as rows 9 & 10
- Row 19: k1, k2tog, k10, k2tog
- Row 20: p –
- Row 21: k1, k2tog, k8, k2tog
- Row 22: p –
- Row 23: k1, k2tog, k6, k2tog
- Row 24: p –
- Row 25: k1, k2tog, k4, k2tog
- Row 26: p –
- Row 27: k1, k2tog, k2, k2tog
- Row 28: p2tog, p2tog, p1
- Row 29: sl1, k2tog, psso
Repeat rows 9 & 10 twice more each.
Thread yarn through remaining stitch and pull tight.
Making Up:
Sew the loose ends of yarn into the back of each wing just enough that the stitches won't unravel. Tying good knots would also work but might leave the wings a little lumpy. Either way there's no need to make it neat, you'll never see the wrong side of the knitting again.
Sew the topsides of the wings to the matching undersides. Leave a 2cm gap to the side of the pointy end on every wing. Try to leave enough yarn attached to close the hole. The four wings are next sewn into place around a wire frame. For a child friendly version you should, of course, leave out the wire and maybe stuff the wings for a cuddlier object.
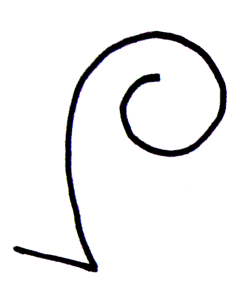
The two sides of the butterfly wings are assembled separately. For each side cut a piece of wire 50-60 cm in length. Bend a sharp angle into the wire about 8 cm from the end.
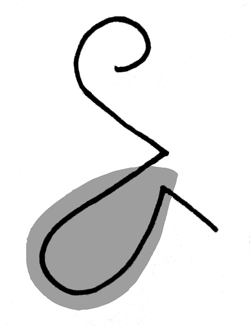
Curl the wire into a loop and slip it into the hindwing. Make sure the loop is as big as the wing, then put a bend in the wire to mark the end of the loop. Finish sewing the pieces of the hindwing together.
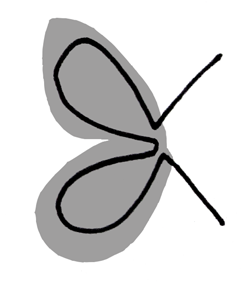
Curl the long end of wire into a second loop and fit inside the forewing. Put a bend in the wire to help fix the loop to the correct size. Sew up the hole in the forewing.
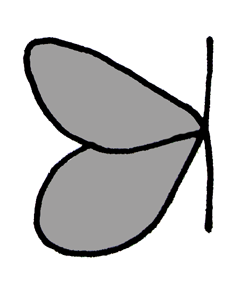
Bend the wings together so they overlap at the point, forewing in front. Use the remaining yarn to fix the wing positions by sewing them together. Repeat all steps for the other side of the butterfly.

Twist the two halves of the butterfly together. Trim the twisted wire so that only a couple of centimetres remain on each side, then bend both ends in towards the centre. Try to keep sharp ends pointing inwards to that they won't poke through the knitting.
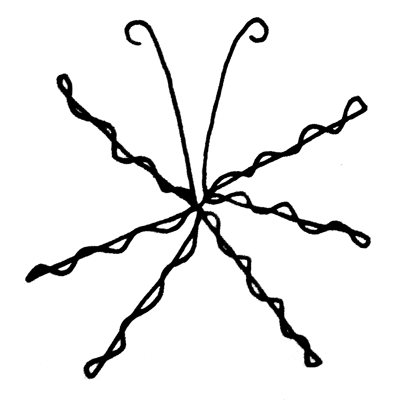
Form the legs and antennae by bending an almost-star shape out of wire. Start at the club tip of one antenna, twist each leg out of a double thickness of wire then finish at the tip of the second antenna. For scale, each spoke should be around three quarters the length of a hindwing.
Using a length of yarn tie the legs underneath the wings. Wrap the yarn back and fourth around the body and legs a few times to make the join secure.
Fix the cast on ends of the two body pieces together with a couple of stitches. Slip the join between the antennae. Sew the cast off end of the underside piece to the lower edge of the moss stitch section on the topside piece (It might be quite a tight stretch around the wire. There should be three legs sticking out each side of the body. Finish off the body by sewing the curled over sides together along the remainder of its length. Lose any remaining loose ends of yarn.
Finally bend each wire leg at the knee and arrange so that the butterfly will stand without tipping forward. Something like this...

Variations:
It may not look like it but this design has already been hugely simplified from the test versions. Butterflies are complicated little beasties! For one thing I'm using the same wing and body shapes for all my butterflies now, when really there is huge variation. I decided that if I was going to go mad with one element of design it was going to be the colours because, let's face it, that's the best bit about butterflies as well as the most recognisable.
There are as many different colour variations for this pattern as there are butterflies. I've only drawn out four charts so far but may well do more in the future. I've also provided a blank chart if you want to design your own.
Each chart is divided into four sections. Knitted pieces within a section are sewn back to back to make a single wing. Click on a chart for the enlarged image.
 | Blank Chart for all your butterfly design needs. |
 | Holly Blue Chart. The body is knitted in a blue to match the wings. |
 | Large White Chart. The body is knitted in a grey. |
 | Peacock Chart. The body is knitted in red. |
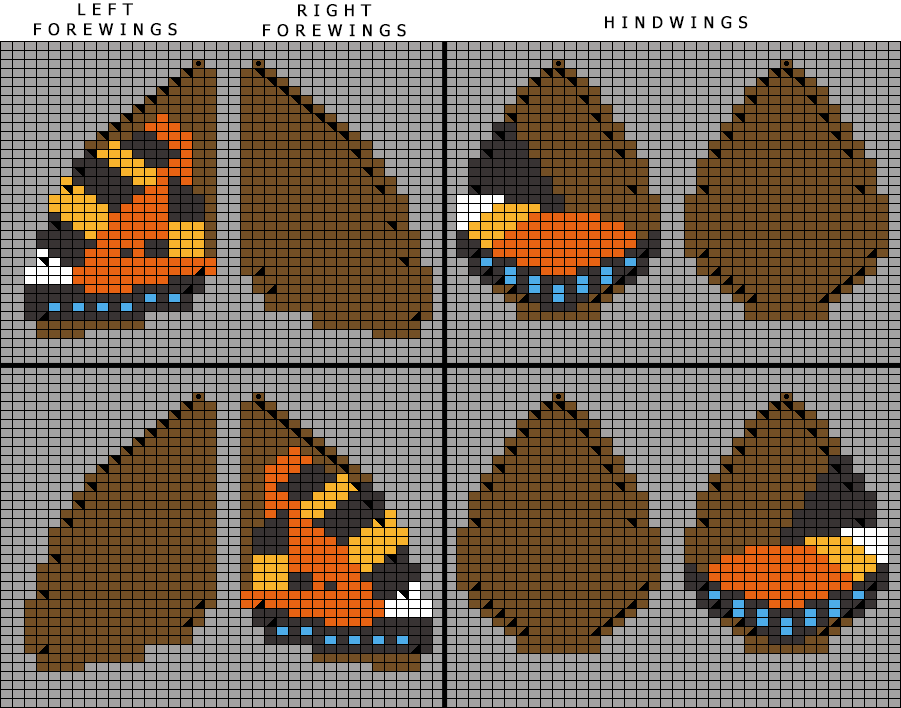 | Tortoiseshell Chart. The body is knitted in brown. |
Notes:
Materials
I've used quite thin wire because it's easy to work with and gives the butterflies a nice trembly behaviour. If you want butterflies that are more steady and sculptural try using thicker wire to support the wings.
Needle/Yarn Size
As with most ODDknit patterns the yarn and needle sizes in the "you will need" section are just a guide. Feel free to improvise with whatever needles and yarn you have lying around - that's half the fun!
<<< See more Creepy Crawlies
© 2017 All desgins and images are copyright of ODDknit. If you enjoy the content of this website, please consider buying me a coffee at the link below.