Blackening Waxcap (R2)

The Blackening Waxcap is a type of fungi that starts off yellow/orange and then darkens, from the top, through red to black. This pattern can be knitted up entirely in one colour or it can show a progression of colours.
A printable version of this pattern is available.
You will need:
- scraps of double knit (yellows, reds and blacks)
- white paper
- toy stuffing
- 4 x double ended knitting needles (3mm)
- tapestry needle
- scissors
Pattern (Cap):
(A list of abbreviations is available.)
Choose the colours you will use for the cap. This can either be one colour or many colours in a progression from light to dark. Arrange the colours in order and use your first colour to cast on. This pattern will not tell you when to chance colour.
Cast on 36sts.
Join into the round and work as follows:
- Rounds 1-10: k –
- Round 11: [k2togtbl, k10] x 3 (33)
- Round 12 (and all even rounds): k –
- Round 13: [k5, k2togtbl, k4] x 3 (30)
- Round 15: [k2, k2togtbl, k6] x 3 (27)
- Round 17: [k5, k2togtbl, k2] x 3 (24)
- Round 19: [k1, k2togtbl, k5] x 3 (21)
- Round 21: [k5, k2togtbl] x 3 (18)
- Round 23: [k2, k2togtbl, k2] x 3 (15)
- Round 25: [k2togtbl, k3] x 3 (12)
- Round 27: [k2, k2togtbl] x 3 (9)
- Round 29: [k2togtbl, k1] x 3 (6)
Thread yarn through remaining sts and pull tight. Tie a knot to hold this stitches closed. If there are any colour changes make sure the yarn ends are secured. Turn the cap inside out (the wrong-side will be the outside of the cap).
Add a little stuffing into the peak of the cap to help it hold its shape.
Pattern (Stem):
In pale yellow pick up 18 sts along the cast off edge of the cap.
- Round 1: k – (18)
- Round 2: [k2tog, k1] x 6 (12)
Work 3-4 cm straight.
- Final Round: k2tog x 6 (6)
Cut the yarn leaving a tail. Go directly to making up without casting off.
Making Up (Stem):
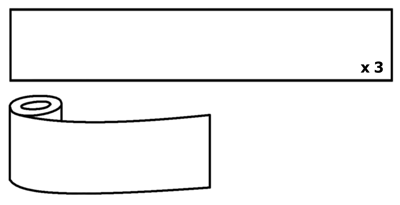
Cut three strips of paper 30cm x 3 – 4cm (a.k.a. take a piece of A4 paper and cut three lengthwise strips about the same height as your stem).

Roll the paper tightly to make a cylinder. Insert the cylinder into the knitted stem and allow it to unroll so that it fits tightly. Thread the yarn through the remaining sts and pull tight.
Sew in any remaining loose ends.
Notes:
Dealing with Wobbly Fungi
The ODDknit fungi are designed to be enjoyed as knitted 3D objects to be picked up and played with, as such they aren't particularly stable when standing. If you need your fungi to remain upright we can recommend the following method.
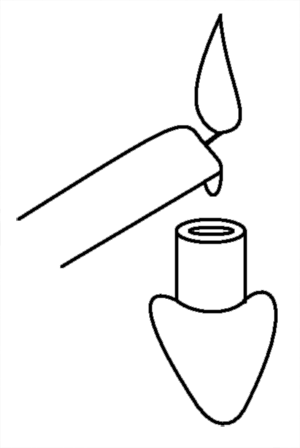
- Light a white candle.
- Dribble a tiny amount of wax onto the base of the stem.
- Quickly press the base against a cold, flat surface (e.g. a mirror or heat resistant work-surface)
- Allow to cool and then twist to release.
- Remove any excess wax from the edge of the stem.

The wax provides a completely flat surface that will help the fungi remain balanced. We use this method when we need to pose the fungi for photographs.
Needle/Yarn Size
As with most ODDknit patterns the yarn and needle sizes in the "you will need" section are just a guide. Feel free to improvise with whatever needles and yarn you have lying around - that's half the fun!
<<< See more Fungi
© 2013 All desgins and images are copyright of ODDknit.


