Tulips (R3)

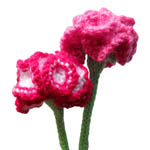
The pattern for the knitted tulip is exactly the same whether the flower is fully open or partly closed. The best part is that you can knit this pattern in as many different colours and variations as real tulips.
A printable version of this pattern is available.
You will need:
- yarn leftovers in yellow, white and green (double knit)
- covered wire
- gummed tape
- 4 x double ended knitting needles (2.75mm)
- tapestry needle
- scissors
- wire cutters
Pattern:
(A list of abbreviations is available.)
Stem and Outer Petals
Cast on 6 stitches in green.
Join into the round and work 16 – 20cm of knitting to form the stem.
In the next round kfb in all 6sts (12), then work two further rounds straight. This completes the stem.
Switch to yellow yarn.
On the first 4sts of the next round work through the pattern for PETAL (see below) once.
Reattach the coloured yarn and work the pattern for PETAL twice more on the remaining stitches.
PETAL
- Row 1: k4, turn and continue in the flat
- Row 2 (and all following even rows): p –
- Row 3: [kfb, k1] x 2 (6)
- Row 5: kfb, k3, kfb, k1 (8)
- Row 7: kfb, k5, kfb, k1 (10)
- Row 9: kfb, k7, kfb, k1 (12)
- Row 11: k12
- Row 13: kfb, k9, kfb, k1 (14)
- Row 15 & 17: k14
- Row 19: k2tog, k10, k2togtbl (12)
- Row 21: k12
- Row 23: k2tog, k8, k2togtbl (10)
- Row 25: k2tog, k6, k2togtbl (8)
- Row 27: k2tog, k4, k2togtbl (6)
- Row 28 (to finish): p6
Cut the yarn and thread through remaining 6sts.
Inner Petals
Cast on 6sts in yellow and join into the round.
In the next round kfb in all 6sts (12), then knit two further rounds.
Work the pattern for PETAL three times, so that no stitches remain. Rejoin the yarn after each petal is completed.
Stamen and Pistil
Cast on 6sts in white and join into the round.
- Round 1-7: k –
- Round 8: kfb x 6 (12)
- Round 9: k –
Finally, repeat three steps below until no sts remain.
- cast on 6sts
- cast off 8sts
- If your cast off method leaves a stitch on the RH-needle, transfer it back to the LH-needle.
Making Up:
Cut a piece of wire the same length as the stem and cover each end with the gummed tape. Insert this into the knitted stem.

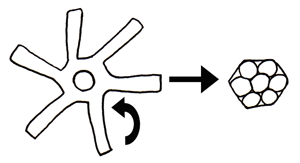
Note how the green section at the centre of the petals has formed itself into a hexagon.
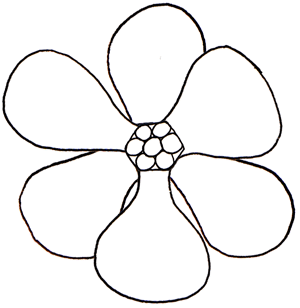
Place the inner petals over the top of the outer so that there is a petal at each edge of the hexagon. Sew into place along the edges of the hexagon.

Bend the cast off edges (stamen) in towards the i-cord section (pistol) so that a hexagon is formed.

Sew this hexagon to the centre of the petals.

Bend the three inner petals up towards the centre of the flower until they touch. Sew the edges of the petals together at the widest point, shown by the dotted line in the diagram.

Bend the three outer petals up so that they surround the inner petals. Sew the edges together at the widest point.
Sew in any remaining loose ends.
Variations:
Tulips come in many colours, so have fun playing with different yarns. Don't forget that there is also great variation in the colour of the stamen/pistol in real tulips.
For a more tightly closed flower sew the edges of the petal together nearer the top of the pattern. For a more open flower, sew the edges of the petal together nearer the base of the pattern.
Notes:
Dealing with Floppy Flowers!
ODDknit flowers depend on the firmness of the knitted fabric in order to keep their shape. If your flowers are overly droopy you may want to consider using smaller needles or increasing the tension of your knitting.

Even if the fabric is firm you may find the flowers listing to the side. Combat this by ensuring that you cut a length of wire that matches exactly to the length of the i-cord stem. If the flower still leans to the side, gently pull down on the knitted fabric of the stem so that the wire is pushed up tightly against the flower.
Needle/Yarn Size
As with most ODDknit patterns the yarn and needle sizes in the "you will need" section are just a guide. Feel free to improvise with whatever needles and yarn you have lying around - that's half the fun!
<<< See more Flowers
© 2011 All desgins and images are copyright of ODDknit. If you enjoy the content of this website, please consider buying me a coffee at the link below.


