

2D Irregular Shapes

A pattern for any 2D shape can be designed by drawing out the shape on asymmetric graph paper. If every division on the paper represents one stitch you can count how many stitches belong in each row.
1. Choose a Shape and a Stitch
Think about the shape that you would like to knit and the stitch you would like to use. Bold, simple shapes work best as do bold, simple stitches. As an example we are going to work through the design of a heart shape in garter stitch on 3mm needles.

2. Set up the Graph Paper
Work out the stitch height (SH) and width (SW) for garter by knitting a tension patch. Use you measurements to set up some asymmetric graph paper* with the same dimensions.
(*Asymmetric graph paper is wonderfully useful stuff. So useful that it now has its own asymmetric graph paper page to guide you through its setup.)
The grid should look something like this:

(Garter stitches are wider that they are tall. If this grid were a piece of knitting the cast-on edge would be at the top or bottom of the picture.)
3. Draw out the Pattern
Next we draw out our shape on the graph paper. Before you begin give some thought to how the pattern will be worked. For example if we start knitting our heart shape from the bottom...
... then one lobe of the heart will have to be knitted seperately.
However if we start knitting the heart shape from its side...

... then the whole shape can be knitted in one go.
We are going to knit the heart from side to side. Draw out the heart the same size you want the finished piece to be.

There is no such thing as half a stitch of knitting so at this point it it useful to decide which rectangles of the grid we will try to include in the design. As a rule any rectangle more than half inside the line of the design should be included.

4. Start Knitting
Look closer at the bottom edge of the image above. We are going to start knitting from the bottom right square.

Row 1
There are seven stitches in the first row. The first row of our pattern will be cast on 7.
Row 2
The second row of the pattern is worked from the left. There are two more stitches than before on the near edge and one more stitch that before on the far edge.
To fit this pattern we need to increse by two stitches at the beginning of the row, knit plain, then increase one stitch at the far end of the row.
e.g. Row 2: kfb, kfb, k4, kfb or Row 2: cast on 2, k9, cast on 1
Row 3
Row 3 is worked in the opposite direction, from right to left, it shows an increase of one stitch at each end of the row.
e.g. Row 3: kfb, k8, kfb or Row 3: k1, inc, k8, inc, k1
Row 4
Row 4 is worked from left to right it also shows an increase of one stitch at each end of the row.
e.g. Row 4: kfb, k10 kfb.
Row 5
The next row is the same length as row 4 so no pattern is necessary
e.g. Row 5: k–
Row 20
The first decrease doesn't occur until Row 20 so we've skipped ahead.
This row is worked from left to right. It shows a decrease of one stitch at the start of the row.
e.g. Row 20: k2tog, k– or Row 20: cast off 1, k–
More
Continue to create the pattern one row at a time until the whole shape has been worked. Increase or decrease as close to the edge of the knitting as possible or the shape will warp.
Finishing
Knit your new pattern all the way through then look at it and decide if you want to make any improvements.
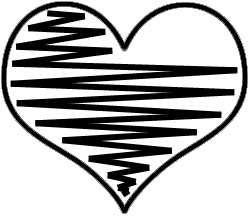
The picture at the very top of the page shows the first heart that was knitted for this example (you can see the original notes in the background). After a few more attempts and a little primping this design became the pattern for the hearts banner decoration.
<<< Back to Shapes.
© 2010 All desgins and images are copyright of ODDknit.